xray 部署使用
Docker 部署步骤
创建配置文件 config.json
{ |
"id": "c4187394-5865-446d-9d8d-3f6c179416b0(UID 替换为实际值)"可以自行生成"dest": "www.microsoft.com:443"伪装的网站地址"privateKey": "mD0OUR8tFvOypHQre6yGgsZs2w-JecH4zkXB9_TY-k8(私钥)"私钥,公司钥对可以使用如下命令生成docker run --rm teddysun/xray xray x25519
PrivateKey: iBKDmvNMfFOAzNPOLRlnJLzoaYbHKs9RFatpW1ELeks
Password: OV_SMIonfy1cEzxnDGZff9x0HeuhuqLyrIj0dLqAaHw
Hash32: 1fEp1041YBnLfSvQYVsRfvGJEA8ZV_LjqFGtQKwaWG0PrivateKey对应私钥(privateKey)Password对应公钥( Public Key ),要发送给客户端使用
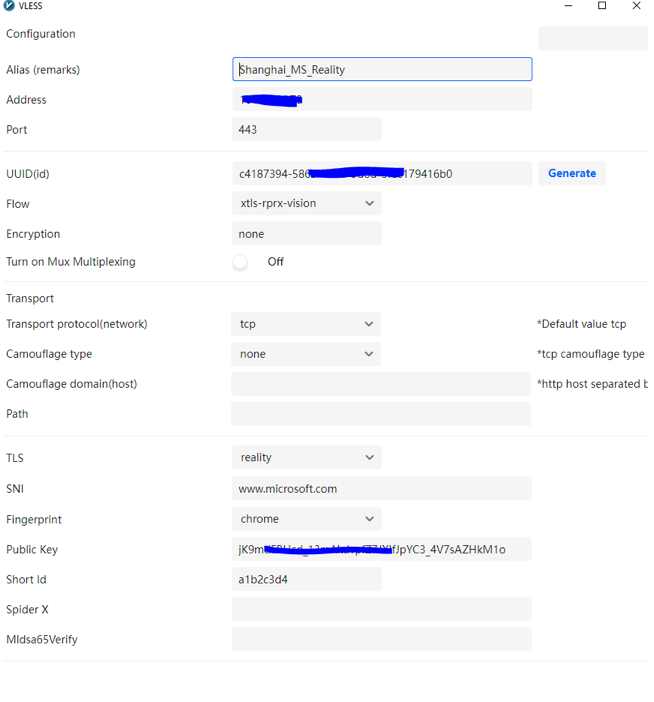
正常启动后,在客户端如下配置:
类型:
VLESS地址(Address):
<SERVER IP>端口(Port):
443# 对应配置文件中的inbounds.portUUID:
<UID># 对应配置文件中的inbounds.settings.clients.id流(Flow):
xtls-rprx-vision# 对应配置文件中的inbounds.settings.clients.flow传输协议(Transport protocol(network)):
TCP# 对应配置文件中的inbounds.streamSettings.networkTLS/安全:
Reality# 对应配置文件中的inbounds.streamSettings.security加密(Encryption):
none# 对应配置文件中的inbounds.settings.decryptionSNI:
www.microsoft.com# 对应配置文件中的inbounds.streamSettings.realitySettings.dest短 ID(Short ID):
a1b2c3d4# 对应配置文件中的inbounds.streamSettings.realitySettings.shortIds公钥(Public key、密码、Password):
<公钥>#docker run --rm teddysun/xray xray x25519命令生成的Password
为了方便客户端导入,可以为配置生成以下链接,其中包含了客户端链接所需的参数:
vless://<UID>@<SERVER IP>:<Port>?encryption=none&flow=xtls-rprx-vision&security=reality&sni=www.microsoft.com&fp=chrome&pbk=<Public Key or Password>&sid=a1b2c3d4#Shanghai_MS_Reality |
大多数客户端都支持从粘贴板复制以上内容自动导入配置。
Windows 中使用 v2rayN 连接 xray server
- v2rayN 版本: v7.18.0
Windows 下载 v2rayN ,将其解压后,运行程序 v2rayN.exe 即可打开程序。复制配置链接( vless://<UID>@<SERVER IP>:<Port>?encryption=none&flow=xtls-rprx-vision&security=reality&sni=www.microsoft.com&fp=chrome&pbk=<Public Key or Password>&sid=a1b2c3d4#Shanghai_MS_Reality ),在 v2rayN 主界面点击 Configuration -> Import Share Links from clipboard 即可自动导入配置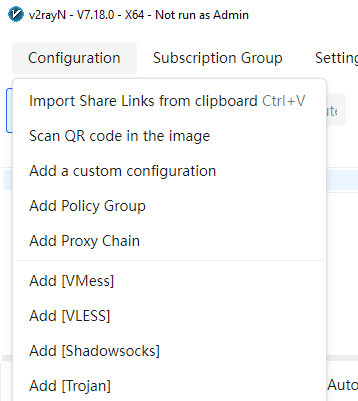
默认情况下, v2rayN 会测试到 google.com 的连接来验证服务端是否正常,国内服务器此测试必定失败,因此可以修改此测试目标。参考以下步骤:
- 导航到 Settings -> v2rayN settings: Speed Ping Test URL ,此处默认值为
google.com,将其改为国内服务器可以访问的地址如https://www.baidu.com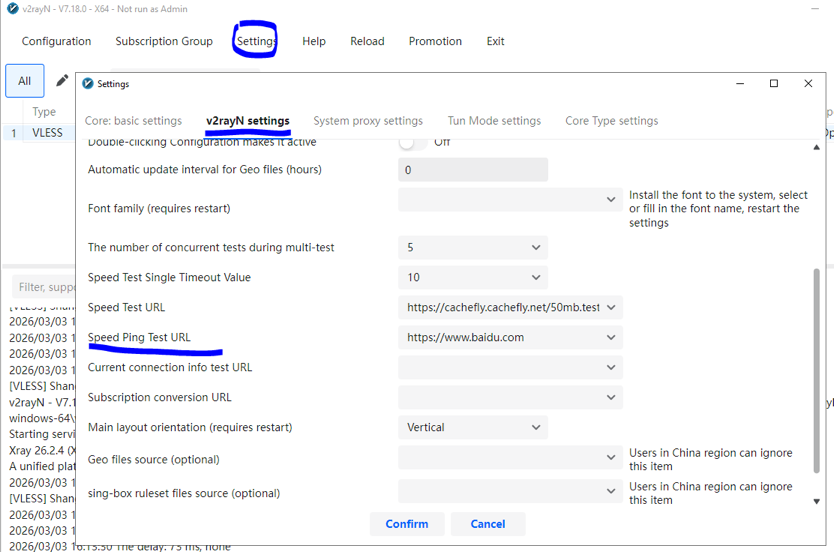
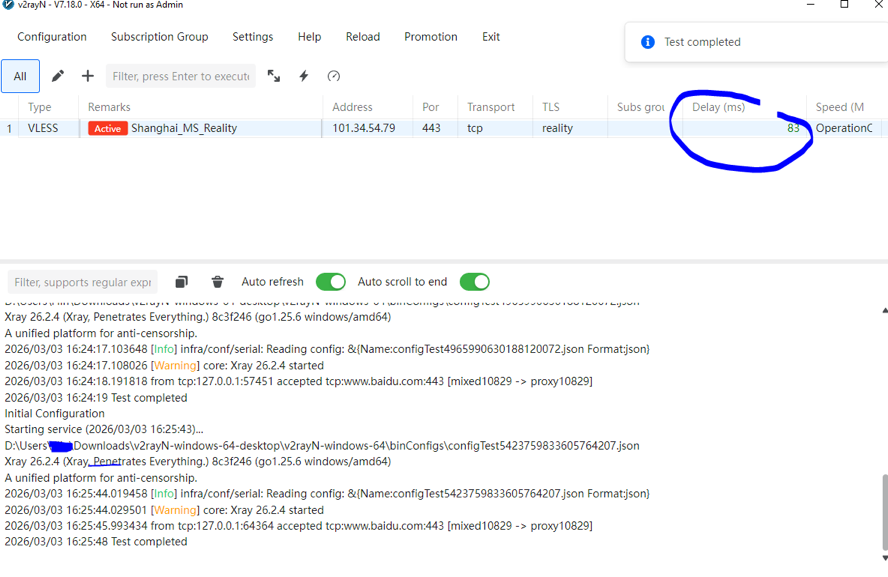
要验证 xray server 工作正常,可以在 v2rayN 客户端进行 延迟检测(Test real delay) 。右键要检测的 xray server 选择 Test real delay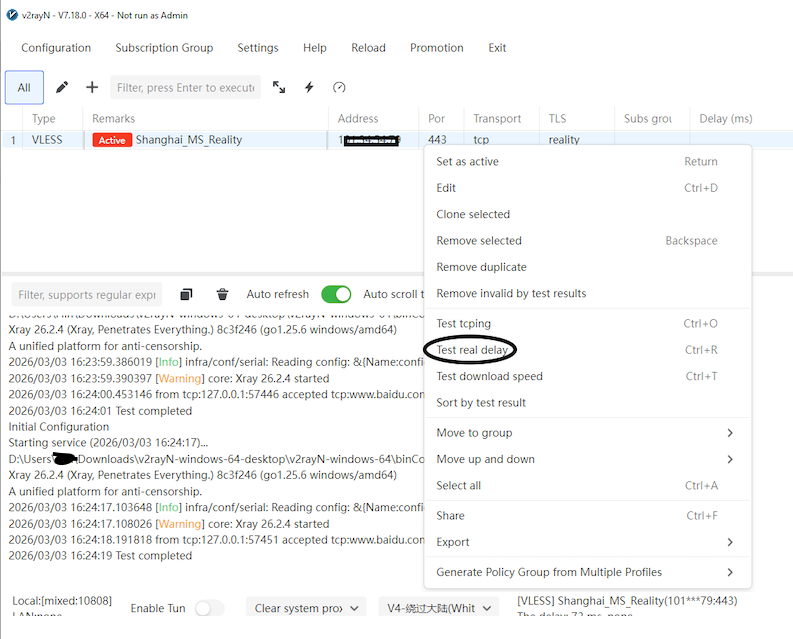
如果能够获取到延迟数据,说明 xray 工作正常,如果未获取到延迟数据,可以登陆服务器,通过命令 docker logs 检查服务端日志